The ham shack started off as an ideal (dream?) many years ago. You see, I have always had my "shack" in some other room in the house. Usually some sort of washer/dryer/hot water heater/utility/musty basement room. Have you ever tried to use your radio while a washer and dryer is in operation next to you? It gives new meaning to the QRM/QRN signals! Anyway, we (the family) moved into a new (to us) house in June, 1998. The new house being somewhat smaller than the previous house just didn't have room for the "shack." At first, I would operate on the covered patio. However, the 115 degree F heat was a bit much for the operator and radios (sort of like having a BUBBA contest everyday!). So, I decided to build a detached ham shack. A building of my own.
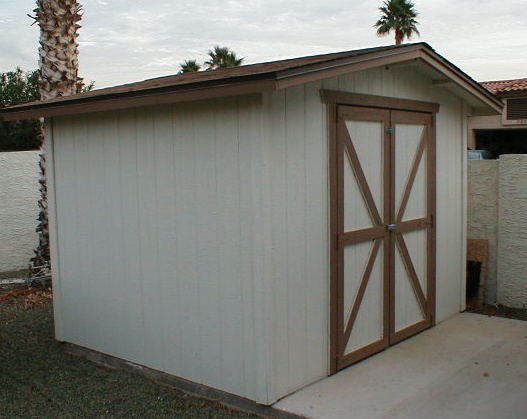
Before I could start to build the ham shack, I had to build a storage building (I had promised the wife). Besides, it would be a good "tune up" for constructing the shack. A local cement contractor was employed to add a new 60 ft driveway as a parking area for the 5th wheel RV and pickup truck. While he was pouring the driveway, I had him also pour the footings/slabs for the storage building and ham shack. The 8 ft by 9 ft slab for the ham shack was located directly behind the house in the backyard. The 8 ft by 10 ft slab for the storage building was located at the end of the new driveway - also in the backyard. It took me about 6-7 weeks of weekends only work to build the storage building. Attention was then turned toward the ham shack.
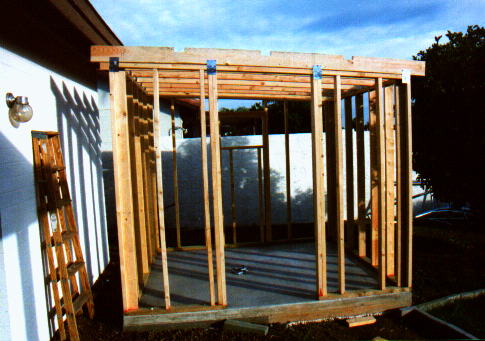
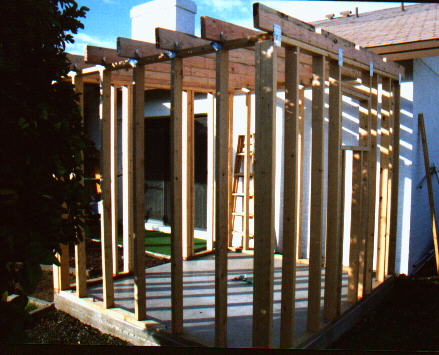
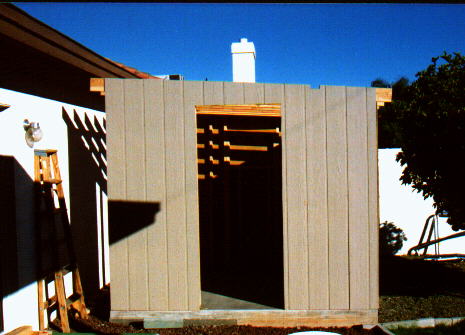
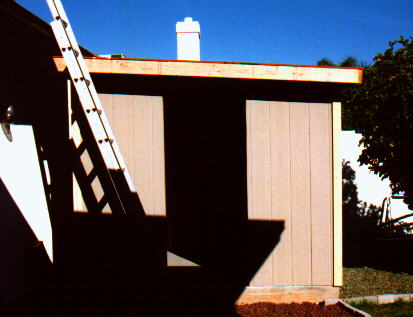
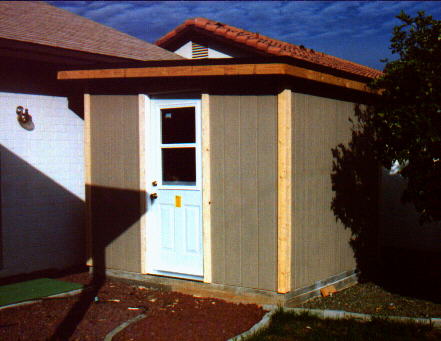
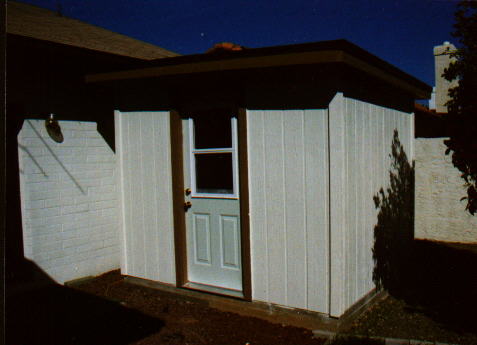
On November 27, 1998 (the day after Thanksgiving), I started construction on the ham shack. The walls were framed in two days and it took another day to add the roof rafters (minus the overhang). The walls were constructed of 2 inch by 4 inch lumber on 16 inch centers. The roof rafters were 2 inch by 6 inch lumber also on 16 inch centers. Simpson ties were used to connect the rafters to the walls. All framing was done with a 16 oz hammer and 16D sinkers - no nail gun used here! The frame was bolted to the foundation using 1/2 inch "L" bolts previously inserted into the cement by the cement contractor. A total of 16 bolts were used. Next, 4 ft by 8 ft by 7/16 inch masonite siding was cut and nailed on. The large sheets were difficult for me to handle by myself so I had my wife help. She and I installed the siding in two partial day sessions. After the siding was completed, the roof over hang was added followed by the roof underlayment. 15/32 inch OSB (sort of a rough looking plywood) was cut and nailed to the rafters - again with the help of my wife. Because of the single 3.5 degree pitch, 30 lb tar paper and rolled roofing were glued and nailed to seal the roof from wet weather. For the front door, I chose a Stanley model K18. This steel door has a dual pane, double hung window which raises for air circulation. 1 inch by 4 inch rough sawed lumber was used for trim around the door and corners. On December 30, 1998, the outside of the building (minus paint) was completed.
The inside construction was started on New Years Day, 1999. The rough electrical work was done first. A small 240V/125A breaker box was installed on the side of the building. I realize this service would probably not power the average CB linear but it is more than enough to power my radios, test equipment, lights, and air conditioner. The breaker box has four circuits wired: 3 120V/20A and 1 240V/15A.
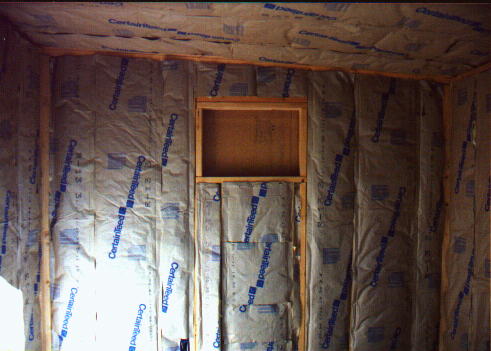
Is there anything worse to work with than fiberglass insulation? After the rough wiring was completed, fiberglass insulation was installed. R13 was used for the walls and R19 was used for the ceiling/roof. Precut 93 inch bats were used. Of course none of the walls were 93 inches! :-)
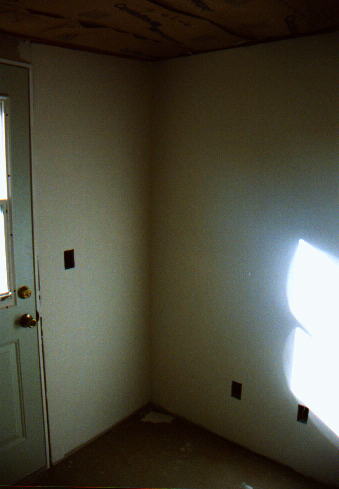
1/2 inch sheet rock was installed for the interior walls. I started out nailing the sheets on (using ring shank nails) but soon switched to screws. Screws seem to hold better and were somewhat easier to install. Fiberglass tape and premixed joint compound was used to cover the nails/screws/seams. I always have trouble with the inside corners and this project was no different. Since I was not covering the sheet rock with a "splatter" or "orange peel" coat, I needed several iterations of applying compound/sanding compound to get the walls looking acceptable. I didn't want too many defects to show through the paint. On January 21, 1999, the walls were primed with Glidden PVA latex primer. The next day, the walls were painted with Glidden Evermore latex paint in Navajo White. I have heard Navajo White pulls in the DX! :-) We shall see.
On Saturday, January 23, the ceiling was installed. I chose an accustic tile ceiling mainly because I could install it by myself. Have you ever tried to install sheet rock overhead by yourself? Besides, the accustic ceiling would cut down on the echo of the room. The ceiling only took about 5 hours work and it turned out well.
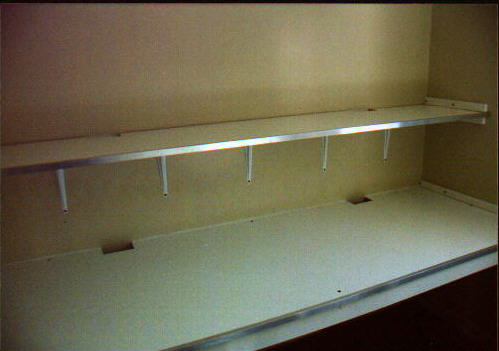
Satuday, January 30, the inside trim was cut and installed. I decided to build in 2 benches. One for operating and one for building/repairing/working. The operating and work bench frames were also cut and installed. Each bench is built into the shack and attached to the walls of the building. Each bench is 88 inches long by 30 inches deep by 30 inches high. Mounted above each benche is an 88 inch long by 15 3/4 inch deep shelf. The benches and shelves are 3/4 particle board covered by White Melamine. An extruded Aluminum cap is used to finish off the front edge of the bench top. The bench frame is 2 X 4 lumber screwed to the inside walls of the building.
Saturday, February 6, did not turn out to be a good day to finsh the inside of the ham shack. Some days Murphy wins! However, by working on the shelves and benches after work each day, I was able to complete them by Saturday the 13th. The floor was painted with Behr Epoxy Paint the following Monday. This paint requires 7 days to harden completely.
The painting of the outside of the building was done last. First, all the bare wood was primed with Behr Premium Exterior Latex Primer. Two coats of semi-gloss paint was then applied. The building painting was finished on February 24, 1999 - a little less than 3 months from start to finish. The completed W5JH ham shack.
This QTH and hamshack was sold in May 2000. A new ham shack at the new QTH will be constructed in the next few months.
Copyright © 1999, 2000 Jerry W. Haigwood